Showing posts with label tutorial. Show all posts

Wednesday, December 26, 2012

Design Tutorial: Color (wheel)

Let's continue on explaining a little bit about "color"
 
This is what I use for designing: the color wheel.
I know some of you will say: "how do I use this color wheel?"
It's not that hard so let's start with basics by showing your the color wheel:
 
Here is an explanation of the color wheel I got from this website:
 
The COLOR WHEEL has 12 segments that consist of primary, secondary and tertiary hues, or colors.
The three PRIMARY colors are RED, YELLOW, and BLUE. They form a triangle on the wheel. These colors cannot be mixed by combining any other colors. They are indicated on the color wheel with a P.
The three SECONDARY colors of ORANGE, VIOLET, and GREEN (marked on the chart by an S) are created by mixing equal parts of the primary colors they fall in between; ie, VIOLET is the secondary color produced by mixing equal parts of RED and BLUE.
The TERIARY colors are the colors that result from mixing the primary and secondary colors on either side of them: ie, mixing the secondary color ORANGE with the primary color RED results in red-orange. These colors are marked on the color wheel with a T.
Using the color wheel you can determine color schemes fpr balance and harmony in your artwork, webpages, desktop publishing designs or home decorating.
Hue: Hue refers to the color...red, blue, etc.
The primary, secondary, and tertiary colors, or hues, are these colors at their full saturation or brightness; that is, there, there is no white, gray, or black added.
Value: the lightness or darkness of a color, or the relative amount (percentage) of white or black in a hue.
Luminosity, or Lightness: A measure of the amount of light reflected from a hue. Those hues with a high content of white have a higher luminance, or value.
Tints: white when added in increments to any color results in a lighter value of that color, called a tint. Blue and white make light blue, which is a tint of Blue.
Shades: black or gray when added in increments to any color results in a darker value of that color, called a shade. Blue and Black make dark blue, a shade of blue.
Saturation: The degree of purity of a hue.
Intensity: The brightness or dullness of a hue. Iintensity maybe lowered by adding white or black.
 
* * * * * * * *


Colors opposite of each other on the color wheel are COMPLEMENTARY colors, this means they work very well together (complement each other/balance).
Like red and green, blue and orange etc...
 
 
This is just a brief explanation about color and we can incooperate this into our "designs".
For example:
 
Red and green
 
I am trying to show you that this is just a tool to help you in designing...
 
You can also decide to use the rainbow colors, like my blog header of my own hand dyed yarns:
 
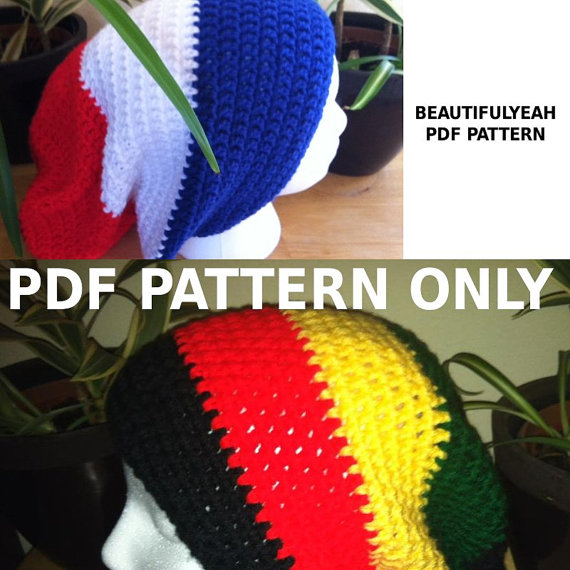
Or like I used the "rasta" colors in my design below:
 
There are so many ways that I won't be able to cover them all but know that working with the color wheel rules you design will look "balanced" and is "easy" on the eyes...
Be free, it's art so let those creative juices flow...
Have fun and feel free to ask questions!


Design Tutorial: INSPIRATION

In my previous tutorial about designing, I have been talking a lot about things that can inspire you. Today I want to show you that even "fellow" artists can inspire you...
Look at colors, compositions, objects, material use, forms, shapes, texture, techniques used etc...really look look

Source: flickr.com via Sarah on Pinterest
Source: flickr.com via Connie on Pinterest
Source: ravelry.com via Suzanne on Pinterest

Friday, December 21, 2012

Inspirations for designing tutorial

I am pretty much a "loner" or a very quiet "observer" as I like to call it myself :)
I don't like to call myself a "designer", I will leave that decision up to you... 
Love to be by myself, mostly, especially when I feel creative inspiration that day...
On top of that, I have an amazing, loving husband that supports me and encourages me daily.
 
* * * * * * * * * * * * *
 
I first like to say that I dislike people that think that sharing "information" on how to design in our "trade" is like giving away a TOP SECRET document.
Well, I believe in sharing and these days the internet makes it possible for everyone to just "google" about everything you would like to know so why not share?
So I don't mind sharing my "top secrets" it's a free world so if you still have questions just ask me!
 
Some times I just like to sit somewhere and observe...soon enough my head starts working and the first thing that happens is that I picture the sketch of my new design in my head.
Second I draw out my little sketch book and sketch it out roughly. I might use or I might not. If I forgot my sketch book...well, I write down some notes in my phone.
 
Some times I just start thinking about all the places/countries I visited throughout the years and try to picture what first pops up as a memory. Than I try to write that down, just words no sketch. At home I will sit down and read through my notes and start translating them into colors or sketch some designs. Some will be executed...some won't...some will sit for a while and some sit for years...
 
Some times it's one of my friends/customers that tells me something they need/want and ask me to translate it into a design.
 
Some times I just take pictures from wherever I am or whatever I like.
 
In the end, there are a lot of ways to get inspired, in my opinion.
Just a package of a product or color combo's used in advertising, magazines, books...anything, you just have to "train" yourself to look different at things. It works for me...
I use these "inspiration" techniques for my knitting, crochet designs, my paintings and sewing.
 
Today, I have no idea what happened or inspired me but I drew up 22 sketches of designs up...
The only thing I can think of is that I "lost" the stress from the last few months since in the past, I worked way too much, had to orchestrated our move over 150 miles and unpack/settle in our new place. Or as I like to call it "life happened" :)
 
The sketches I drew up today are probably going to be a combo of crochet, knitting and/or sewing. I just have to work on each one and tackle all the details.
I start with determine the size, material choices, base colors/background colors, subject and finally detailing/accents. It's a process that takes a while, some times days/weeks/months/years. I have a bunch of sketches that just need detailing or a sample that I need to finish but I am married too LOL. There are only so many hours in a day :)
 
One important thing I learned while starting to design is:
"I can't "force" myself in being creative...I need to let "it" just happen"
"open yourself up to new ideas"
"think outside the box"
"relax"
 
Maybe this little "tutorial" on how I get to my final designs helps you...good luck!!!
Need help/second opinion or....? Just ask...
 
 
* * * * * * * * * * * *
 
Remember for those who don't know...
I wasn't born here so...
I will make grammar mistakes or misspell words or..., I don't think I need to apologize for them, since English isn't my first/native language. Just picture yourself living in a foreign country...you will never be a native speaker :)
thank you for understanding and just know: I do my very best to keep them to a minimum!!! :)


Thursday, December 20, 2012

Preparing for my mug rug sew along tutorial, granny square blanket and ....

For those who follow me on Facebook already know that I almost finished my crochet (granny square) CA King size bed cover.
Just a few more rounds to complete it, so it nicely covers the sides of the bed.
It is a huge project that at a certain stage you can only work on the bed or in a big chair.
Constantly turning it around to be able to keep working on it,
but after finishing 4 previous bed covers (same style, different color combo's) I knew what I was in for...
Blanket is made in Caron One Pound.
 
Last steps are the finishing rounds, reverse single crochet edge and working in the ends, it will soon be used on our own CA King bed.
Video for single crochet edge:
 
 
Puppy Snuggles loves it too :)
He has a fetish for blankets since he was 2.5 months young LOL
 
 
Almost done... :)

 
* * * * * * * * * * *
 
I finally made some time in the day to get my nails done (last nail tech flaked on me).
Taking care of myself:

PRETTY!!!
 
* * * * * * * * * * * *
 
Tonight I found my little stash of fabrics so I can start thinking about combo's, patterns and work on the photo tutorial.
I even found a 2 yard Christmas panel that I still can use to make a Christmas quilt/wall hanging!!!
WOOHOO BONUS!!!
But that has to wait a little bit since the mug rug tutorial has to be done first.
 
Here is a picture of the few fabrics I have left, let me know if you see any combo's...
 

I don't know where I got the Betty Boop Bingo fabric from...????
Did I tell you that mug rugs are perfect fabric stash busters??
 
* * * * * * * * * * * * *
 
BTW did you notice that I have 2 blogs so that it is easier for people to follow:
 
 
You choose!!! Same posts on each blog so don't worry about missing out :)
 
* * * * * * * * * * * * *
 
So this was pretty much my day today...besides the regular errands/wife duties :)
See you soon again and thank you for visiting.